Thursday, February 28, 2013

Miso Glazed Wild Call of Duty On Spinach

I went shopping yesterday and picked up some wild Pacific cod. When I told my kids we were having Cod for dinner, they said: "Oh COOL! Call of Duty!", which is their newest video game that I don't approve of. Hence, the miso glazed cod became miso glazed call of duty.

What I like about cod is its wild and has a lovely rich flavor without being "fishy". I generally don't like eating farmed fish, and I am trying stay away from fish that is really high on the endangered list, like Atlantic Cod.

So I made a really simple glaze to marinate the fish in. To a small pot add equal amounts of rice vinegar and Sake. I probably used between a quarter cup and half a cup.


I prefer to use mirin but I was out, so I subbed with the vinegar. As for the sake, it would have worked better if I had used normal sake that you heat, but I hate to open a big bottle of it unless I plan to drink it all because it goes 'off' very quickly. I used a small bottle of cold sake, which is more like a beer. If I wasted the rest (yeah right) I wouldn't feel so bad or wasteful.


Boil them together for a minute or two, shut the heat and add about 3 heaping teaspoons of sugar. Stir to dissolve. Add a huge wodge of a light miso. I like the Light Yellow Miso by Cold Mountain. It is japanese style shiro miso and is GMO free. Its extremely flavorful and can be worked into a TON of dishes. I used approximately an equal amount of miso as I did of the vinegar and sake, so between 1/4-1/2 cup. Whisk to dissolve


Always taste as you go, so you can adjust if necessary. You can also decide at this point that you want a bit more flavor or a change to the flavor. I decided to add a bit of garlic (2 cloves) and ginger, a small nob (shut up all you dirty minded people).


Once it cools, taste it again to see if needs any adjustment. Pour it all into your handy dandy ziplock bag, and throw in your fish to marinate. It can marinate up to a day in the fridge. I left mine for 3 or 4 hours.


For some reason, blogger keeps turning my pictures sideways and I can't seem to fix it. So you will have to turn yourself or your computer sideways if you want to see this picture a little bit more accurately. It did the same thing to my Upside Down pear cake yesterday. The picture of the pecan/pear/butter mixture was upside down. Well.... it *was* an upside down cake... I guess that is blogger's attempt at humor. I think they need to stick to their day job. (And to those of you who suggest the same to me.... bite me. That is all.)

Back to the fish. Once it had marinated for an appropriate amount of time, I fast grilled it on a cast iron pan, and then finished it in the oven. I laid each partially cooked piece of fish on a bed of spinach, and poured a little marinade on top. Baked it for about 8 minutes, and then broiled the top for a minute or so, to get that lovely glaze. While I would love to show you pictures of all this, I couldn't find my phone so you will just have to take my word on it. It was good. Miso Glazed Call of Duty rocks. I found a picture online (photocredit: www.dallasnews.com) of what it looked like, sorta.


All in all, prep time was about 5 minutes, and cooking time was under 20 minutes.


Wednesday, February 27, 2013

Upside Down Pear Shaping Cake

This cake turned out DELICIOUS. Like seriously outstanding. And it was SUPER easy. I won't say "easy as pie", because I have always found pie making to be not so easy. Where did that stupid expression come from, anyway? Maybe I should say it was a "piece of cake", since in this case, it was! Sadly, I ate several pieces of cake. And I am starting to look like a pear. But I digress.

The cake.

Upside down pear cake is simple to make, delicious to eat, and looks beautiful too, despite my crappy photography skills.

Slice up some pear. Or you could use apple, or pineapple, or just about any sort of fruit you want. I think it could work with lots of different types. I chose pear, and I ended up using only one large pear, but next time I think I would add more, to make a thicker upside down top. Slice it so that it is about 1/4 inch thick, give or take.


In a small pot, melt about 1/4 cup of unsalted butter, and once it is melted, add about 1/2 cup of brown sugar. Mix it all together. Add about a teaspoon or so of cinnamon and mix.


Pour about 1/3 of this mixture in your pan. I used a square pan, probably about 8 inches wide. I've never measured it. In future, a bigger one would probably better, as you shall soon see. Lay the pears down in an artful fashion over the sugar/butter mix, to cover the whole pan. Add a bunch of pecans or walnut and make it look pretty. I didn't measure the pecans, I just added until it looked right. Pour the rest of the sugar mixture over the top of the pears and pecans.


Set this aside while you make the cake batter. In your stand mixer, beat 3 eggs, a huge wodge of vanilla, 1.5 cups of cane sugar (or whatever kind of sugar you have) until fluffy and light. Add bits of butter, 1 chunk at a time, until you use 3/4 cup of unsalted butter. Probably it would be best to add totally room temperature butter with the sugar, then add the eggs, but I forgot to take the butter out of the freezer so had to do it this way. Either way, it worked handily. Once all the butter has been relatively incorporated, add a cup of sour cream. This is was makes the cake so FREAKING moist. In a separate bowl, mix together 2 and 1/4 cups flour, and take out 2-3 tablespoons of the flour, and replace it with and equal amount of cornstarch. I use organic cornstarch. Add 1 and 1/4 teaspoons of baking soda, 2 teaspoon of baking powder, 1/2 teaspoon of salt, and sift it all together. In two batches, add it to the wet batter. Turn your machine on slowly and very briefly to incorporate the flour. Pulse it, in fact, unless you enjoy cleaning flour off your entire kitchen.


Shmear this batter over the pear mixture and bake in a 350 oven.


Cooking time depends on how big your pan is. If it is not huge, like mine, you will need to bake it for 50 minutes or so. Check it periodically. What you want is the centre to bounce back nicely. I started checking after 30 minutes, and initially you could see the centre was still liquid in the way it moved.


Lesson learned: Put a pan under this to catch all the drippings that bubble up and over. Unless you enjoy scrubbing the crap out of your oven afterwards WHICH I REALLY HATE TO DO.


I really hate the toxic fumes from things like Easy Off, so I googled how to naturally clean this mess. What I found was to spray white vinegar all over it, and then pour baking soda on it and let it sit. For a loooooong time. Then scrub.


Actually, with a little elbow grease it came off. Eventually.


Looks pretty good, no? So back to the cake. Once the centre no longer wobbles like a weeble, take it out of the oven and let it cool for about 10 minutes.


Once it has cooled, put a plate on top of it and flip it over. It should pop right out. If it doesn't, I don't know what to tell you, but it will probably still be delicious.


Holy. Amazing. Yumminess. I am DEFINITELY making this again. As soon as I no longer look pear shaped.


Please note for all the stupid people out there: I only cleaned the oven once the cake was completely done, and the oven had fully cooled. Thank you.


Saturday, February 23, 2013

My Pinterest Semi-Fail

I adore Pinterest. I really love it. I spend hours looking at all kinds of stuff, primarily do-it-yourself crafts. Strangely enough, I don't look at the food and drink section. I may look at something food related if it is in the DIY Craft area, but I don't go searching for recipes. I have enough cookbooks for that. Okay, I probably have 150 cookbooks, and its still not enough. DON'T JUDGE ME.

Anyway, while I was cruising through the DIY section, I came across these fabulous looking potatoes and thought, I should make those.


To be honest, I couldn't quite remember how they did them on pinterest, and I didn't really have time to go searching for them because I had sadly forgotten to pin them. I decided to make it up as I went along, much as I do all my cooking.

They didn't end up looking quite so pretty, but were really tasty. At least I remembered that everyone on pinterest used Yukon Gold potatoes to make these, which I rarely buy. I tend toward the red skinned ones as I find them to be creamier overall. This week though, I bought Yukon Golds. Tadah! I was prepared.

Take your potato, wash it, dry it, and remove any eyes that are growing on it. I read last week (on pinterest, of course) that if you put an apple in with your potatoes it will stop it from growing eyes. If anybody ever actually remembers to do that, let me know how it works out for you. Lord knows I'll never remember to put an apple in there. Or if I did, I'd never remember to remove it from there so it would end up turning to apple mush and ain't nobody got time for that. So like I said, gouge out the eyes. Blind that sucker.

Thinly slice about 75% of the way through the potato. When you screw up and slice all the way through, don't worry. Just cram them back together. It all tastes good in the end.


Place all the cut potatoes and their pieces that you screwed up with on a baking sheet. I always cover my baking sheet with either a silpat sheet or tin foil, because my cookie sheets are really old and kind of nasty from having so many things burn on it and never quite come off.


In a little bowl, I added enough EVOO to drizzle on them, some chillis and I ground a couple garlic cloves into it to make it more of a flavored oil.


I used a teaspoon to attempt my initial drizzle of the flavoured oil over the potatoes. The biggest difference I noticed with my potatoes as opposed to the pinterest ones, was that they didn't fan out so beautifully, so drizzling the oil on it was much more difficult. I had to do a lengthwise slice on it, and manually try and open the potato up and try cram in some of the herbed oil. I then finished them with some fresh ground pepper and sea salt.


Preheat your oven to 425 and pop them in for about an hour or until nice and crisp.


Okay, so they aren't complete Pinterest fails, but I don't think I can post the picture with "NAILED IT" on it either.

But they were tasty, and definitely ones I will make again. And they can have variations. Different herbs (rosemary, oregano, or indian spices), or you could add cheese and sprinkle it with minced parsley and green onions when they are ready, or you could put any sort of potato chip flavor on it you like. Mmmmmm.....the possibilities are ENDLESS.


Thursday, February 21, 2013

The House of Mister E, Chef Extraordinaire!

I have always said I would teach my sons three important things:

1. How to cook
2. How to clean
3. How to dance

A man who can do those three things is a sexy man. Having said that, my darling husband can't do any of those things; and yet I think he is the sexiest thing on two legs. I do wish he could cook though. And clean. And dance. Ah well, such is life.

But I made it my mission to make sure my sons could do these things. And they can! Well, sort of. Both can dance, and will dance, EVEN IN FRONT OF PEOPLE, as long as there is good music. Both can clean. Sort of. As long as I nag the crap out of them. But they can do it! When they were younger, and misbehaved, I used to make them clean the toilets. I figured if they were acting like crap, they could clean it up! In truth, they can do laundry, vacuum, clear the table, empty the dishwasher, walk the dog, clean up dog poo, make beds, mop, fold, and all kinds of other cleaning related activities. I taught them how to do all these things not just because they need to know how to do it.... but also because I hate doing it. I don't want to be cleaning up after them when they are adults.

And now to cooking! My younger son really shows an aptitude for it, and actually enjoys it. He cooks with me often. When I was laid up with a broken leg, he cooked several meals. Up until now, his speciality has been Thai Coconut Curry Mussels. This week, he has a NEW specialty.

Rigatoni ala Vodka.


There are a couple of restaurants that we go to that serve this dish that Ethan really loves. Its rigatoni with a tomato cream sauce, vodka, some form of bacon or pancetta, spring onions and sun dried tomatoes. He decided he wanted to make this dish. So make it we did!
First, I had him write down all the flavours and possible ingredients he remembers from it.


Alan can't eat cow's milk or milk products, so we substituted goat cheese to get that creaminess.

The nice part about this recipe is that you never have to measure stuff, and if you don't have all the exact ingredients you just substitute. For example, you could use: bacon, pancetta, proscuito, smoked turkey, smoked spices or nothing and keep it vegetarian. You could change the goat cheese to cream or coconut milk (which would change the flavour considerably) or possibly almond milk or rice milk. You could forget the onions or green onions. You could use wine instead of vodka, or tequila or some broth. Whatever you choose. Here is what Ethan chose: pancetta, vodka, tomato sauce and paste, goat cheese, garlic, onions and green onions, sundried tomatoes and chilli.

First he chopped up a few strips of nitrate free organic pancetta. And yes, thats my incredible Kyocera super sharp ceramic knife. He was being extremely careful.


He sauteed the pancetta until it was almost crisp in a large bottomed frying pan, then added the chopped up onions and garlic.


Once those were nice and fragrant, he added tomato paste (about half of the can) and then the vodka - a nice big sizzling splash.


Once the sizzling settled down, he added a jar of tomato sauce, about a nice big wodge of goat cheese, about half a cup of water to thin it out, some chilli flakes, a bay leaf and a nice big handful of chopped up sundried tomatoes. The green onions were added on top of the finished dish to garnish and give it a bit of zing with the green color and the flavour.


As you can see, he didn't add a lot of chillis, so we put the chillis on the table if anybody wanted extra heat. Each step along the way he tasted the sauce to see if it was missing anything, or needed any additional seasoning. As the water for the pasta was salted, and the sundried tomatoes and the goat cheese have a nice tang, it wasn't necessary to add any salt to the sauce.

In a separate pot, we boiled up the salted water and added 1 box of spelt rigatoni, and 1/2 a box of spelt penne. We ran out of rigatoni, so had to make do. We cooked it al dente, and tossed most of the sauce with the drained pasta and coated it. The left over sauce we put on the table for anybody who wanted that little bit extra.


Ethan also said we needed to make a salad with balsamic vinegar dressing. He then wrote the menu on the blackboard in the kitchen, as the daily special.


Overall, the dinner was delicious, and I am SO proud of my monster.


I have been informed that for his next cooking experiment, he wants to make a dessert. Next weeks challenge: Key Lime Pie.


Its hard to see because we were laughing and moving, but thats a bag of key limes.

Now to research key lime pie....yum.


Friday, February 8, 2013

Passdapasta

I have been wanting a pasta maker for years. YEARS. I just never felt like spending the cashola to do it, so I figured one day, a pasta maker would drop into my lap. THAT DAY IS FINALLY HERE!

I love it. You put your request out into the universe, and VOILA, five years later, it comes TRUE! How cool is THAT? My next request is for cheese making equipment and one MEEEELION dollars!


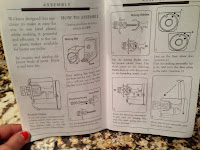
Some lovely friends of mine cleaned out their basement and found a practically brand new machine, back from the 90's. Still in its original box! (Which, by the way, was a BITCH to put back together. It was worse than Tetris.) At least the machine itself came with detailed instructions on how to put it together. This too was tetris like.


I followed the directions in the book, using spelt flour (2 of the provided cups), 2 beaten eggs, water and EVOO until the line on the provided cup. You dump everything into the machine and turn it on.


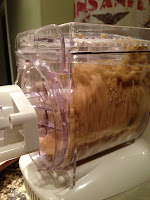
Once it has had a chance to mix and look like play-doh, you turn the machine off, wait a beat of two, and then turn it on to EXTRUDE, which sounds horrible and actually looks quite disgusting.


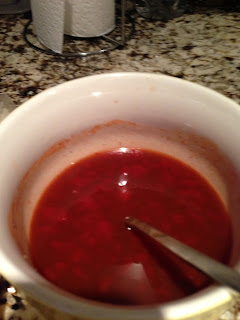
Which totally reminded me of this:

Note to self: Never add beets or red dyes to homemade pastas.

Actually, it was pretty cool watching it EXTRUDE. Every once in a while I used the little white thingamabob like a guillotine to chop it off.
As I gathered it on a plate, I dusted it with a bit more spelt flour to stop it from sticking, and just sort of tossed it around to help it dry since I didn't have anything to hang it on.


Once I had enough for dinner, I got a large pot of boiling water going. It is very important to salt your water when making pasta. Also, never add oil to the water. You should add enough salt that the water tastes like the ocean. I also crank a few grinds of pepper in to remind myself that I have salted it, so I don't do it twice. If you put oil in the water, whatever sauce you pour on the pssta will slide off it instead of getting in all the nooks and crannies.


Keep a good rolling boil on when making pasta. Give it a good juj every once in a while, so it doesn't stick to the bottom of the pan.

For my first pasta making experience, I made linguini. I will not make it again. Next time, I will make fusilli or penne or rigatoni. Something big. Cleaning that little piece that makes the pasta shapes is such a pain in the ass. I had to soak it and use this little poker thing to get the bits of dough that were stuck in it about 398480398290 times. That one stupid piece took me about 30 minutes of cleaning time.


As I was so intent on making the pasta itself, I didn't really think about the pasta sauce until I was just about to throw the pasta in the pot. And just a note, homemade pasta cooks in about 3 minutes. So I decided to go really easy. I had half a jar of tomato sauce in the fridge and I pulled out some frozen pesto from a previous blog. I added a good wodge of the pesto (about half of the baggie) to the jar of tomato sauce, covered it and heated it while I cooked the pasta.


Overall, I think my first pasta experiment was a success. Now we just have to work on table manners.


Thank you again to the Gartner Family for this fabulous loan. Once I have worked on my pasta making skills a bit more, you can expect some noodles in your mailbox.

Any chance of some cheesemaking equipment in your basement too?


Baked Fried Chicken

I think most people love the taste of fried food, but don't like all the fat and calories and unhealthiness associated with it, so this recipe came from the desire for the yumminess, but not the fat waist.

In an ever trusty ziplock bag, add a generous helping of breadcrumbs, about three quarters of a cup or so. I really like the Shasha brand of breadcrumbs. They are spelt, which means Alan can eat them, and I have found them to be SUPER tasty. They give a marvelous crunch.


To this, throw in a whackload of seasonings. I added a couple tablespoons of garlic powder and zaatar, a tablespoon of black pepper, cumin and oregano. I also added about a teaspoon each of salt and chilli powder. It really doesn't matter what you throw it, it all works. I don't measure. I just throw it all in. Once, the plastic lid on the pepper fell off so about a quarter of a cup of black pepper fell into the mix. It still worked, but was quite spicy.

Dip the chicken pieces (or fish or cheese sticks or whatever you want to batter) in a beaten egg. One egg will do for a lot of chicken pieces. I know that you are supposed to dip the chicken in flour first, then the egg, then the breadcrumbs, but I can never be bothered doing that, and it works just fine without it. Once you dip the chicken in the egg, throw it in the breadcrumbs and shake it around to coat it. In essence, you are making a healthier (and tastier) version of shake and bake. I bought a whole chicken and cut it up into pieces, skinned it, and picked up some extra legs as well. The backbone of the chicken I throw in another ziplock freezer bag and keep for when I want to make chicken soup. So much more economical to buy a whole chicken than to buy pieces, and you have the extra bones for soupmaking.

Lay everything on a baking sheet, crank the oven to 350 and bake for about an hour.


Delicious. Sadly, the kids dove into the chicken befoer I could snap a picture of it, so you will have to trust me on the fact that it looked and tasted delicious.

A note: Once you have finished tossing all chicken in the breadcrumbs mix, whatever is left over needs to be thrown away, unless you enjoy getting salmonella.


Wednesday, February 6, 2013

Spinach on the side

I ALWAYS make salad. Dinner isn't complete without a salad, much to my kids chagrin. Which is why, I often make Salad Shakes in my fabulous Vita Mix; but I also to have a green side WITH the protein. It just feels more complete. And I adore baby spinach. One of my favorite dishes is lightly wilted spinch with garlic and soy sauce cooked in melted butter, however I can't make that because of
Alan. He can't do the butter. If you are ever at Sushi on Bloor, try their spinach dish. It rocks. My sister and I always share it.

The other night I wanted spinach, so I improvised a dish I have never made before. I threw in all kinds of bits and bobs I had left over, and it came out AWESOME.

In a large soup pot, add a bit of EVOO to coat the pan, and about a teaspoon of toasted sesame oil. Never add more than that, because it will over power the dish and taste awful.

Chop up some onions, garlic, any kinds of mushrooms you have (I used 3 old, somewhat dried up shitake mushrooms I found in my fridge and a huge handful of enoki mushrooms), and shred some cabbage. I used red cabbage and savoy cabbage, but any kinds will do. On a medium high heat, sweat out your onions. After they have cooked a bit, add the minced up shitakes. If you don't have shitakes, use regular or portobellas or whatever you have. I mince them small enough that you can't tell what they are. Ethan (my youngest) dislikes mushrooms on principle, and if he sees them he won't eat the dish. If he doesn't know they are there, he likes it fine.


I added the enokis after the shitakes were about cooked. You can add them whenever, but they cook fairly fast. Grate some frozen ginger into it, add a generous splash of soy or braggs and throw in the shredded cabbage. Toss it around a little bit.
Ignore my chipping nail polish.

Toss it around just to lightly wilt the cabbage. I like it crispy. It gives this dish a bit of crunch.


Toss in LOTS of spinach. It wilts down to practically nothing. At this point, I usually turn the heat off after I have tossed it a couple times, cover the pot and let it rest while I finish off the last few things for dinner. By the time I am done getting everything else on the table, the spinach is done. If it still needs a bit more, I turn the heat back on and steam it for another minute or so.


When it is ready, I put it all in a bowl and sprinkle a small handful of sesame seeds and some strips of seaweed (nori) on it. Seriously, its delicious.


My kids even like this! ...As long as Ethan doesn't see the mushrooms!

It is also delicious as leftovers, or on a bed of rice.

Saturday, February 2, 2013

Pad Thai and Salmon. Two Separate Meals of Hell.

So this week I was doing a cleanse. Normally I do fasts, but this time I was doing a new (for me) cleanse I had read about on the internet and it got good reviews so I thought I'd try it. I was allowed to eat, but only certain things.
The problem is that when I cleanse (or fast, for that matter) I still have to cook for the family, and that kind of sucks. It is hard to see and smell yummy food and NOT TASTE IT. One of the difficulties I face is that I always sample the food as I am cooking to adjust seasonings. Especially since I rarely measure, tasting is essential. Oh well. I would have to make do.

I made a few dinners while on the cleanse. One night was Omlette Night, which was easy to not taste. Another night, I made a salmon. I popped it in the oven and then left Alan and the kids to figure it out.


As always, this is super easy to make. In a large ziplock bag add about half a cup of soy sauce. (As usual, I use Bragg's Liquid Aminos because it is gluten free) and about a quarter cup of real maple syrup. (I never use the fake crap). Add a few cloves of minced garlic and toss in the fish and seal. Allow it to marinate in the fridge for anywhere from half an hour to day. Normally I would BBQ this, maybe even on a cedar plank, but it was cold, rainy and nasty outside and I really didn't want to smell the yummy smoky torture if I wasn't going to get any, so I laid it on a baking sheet in a 350 oven for about 15 minutes.

I have no idea how it tasted but it smelled great. Alan and the kids told me it was delicious. It must have been. I was expecting enough leftovers to feed the kids dinner the next night, but there wasn't enough. It was probably a good thing that I wasn't eating, because they all descended on it like hungry buzzards. Which meant I had to cook again. Which led me to my next improvisation for dinner. Pad Thai.

My kids LOVE Thai food. My 11 year old son can make Thai Coconut Curry Mussels himself (recipe to be blogged about in a future post). A lot of thai food is gluten free and dairy free, so its one of the few types of restaurants we can go to that can easily accomodate Alan and his dietary needs. Thank God we all love Thai!

So to make Pad Thai, you need rice noodles. I had a batch of medium thick ones in my cupboard.

Thai food is great, because it satisfies the palate with a perfect blend of salty, sweet, sour and spicy, not that I would satisfy my palate on this day. In a bowl, I mixed fish sauce (salty), rice vinegar (sour), sugar (sweet, duh) and some thai chillis for the heat. It was roughly equal parts of fish sauce and vinegar, a couple teaspoons of sugar and however much heat you want. We like it hot.

I mixed it all together and voila! Instant pad thai sauce.

The most important thing to remember with pad thai is to get everything ready before hand. With the wok you move pretty fast, so it needs to be ready to go. I chopped up all my veggies and had them waiting. I used onions, garlic, carrots cut into matchsticks, sugar snaps, enoki mushrooms, red cabbage, cilantro and bean sprouts. You can add any other veggie you like, that fries up nicely. Peppers, zucchini, celery, eggplant, you name it. Or you can delete any of the above you don't like. I also used my vita mix to crumble a nice handful of almonds. I didn't have any peanuts in the house, so almonds substituted nicely. Also, have an egg or two beaten and ready to roll.


Boil the rice noodles until they are al dente, probably about 5 minutes. It depends on the thickness of the noodle. If they are really narrow, you might even be able to just soak them for a time. I never get the timing right on soaking them, so I find a fast boil works just fine. Drain when ready and set aside.

This recipe calls for a wok. I have no idea how old my wok is. I remember cooking my very first ever meal in it. I was in grade 8 at the time, which puts me at 12. I no longer have the original lid for it, and I don't know what happened to the base ring. I just put it right down on the burner as is. My wok is well seasoned. After each time I use it and then wash it, I give it a quick wipe with oil to keep it from rusting out. This wok is almost as old as I am. Quite possibly it is in better condition.

Oil the wok to cook in. Normally, I like to use EVOO with everything, but with a stir fry it is not the best choice. You need an oil with a high smoke point, because you fire that wok till it is SCREAMING hot. I used:

Once its screaming hot, add your onions and quick fry. Start adding all your other veggies, except the ones like cilantro and the sprouts. Those are for when you are ready to serve, since they don't need cooking. They are really garnishes.


Once your other are veggies ready, toss in the noodles and keep tossing. Add your sauce, and then the eggs. It should go fairly quickly.


Once it is all cooked, toss on your cilantro, sprouts and nuts. Serve. And in my case, walk away.


Apparantly, it was very tasty. Crap.